You’re standing outside your home, groceries in hand, as your Kwikset smart lock’s keypad stays stubbornly dark. Or maybe the deadbolt grinds but won’t latch while rain starts falling. These aren’t rare catastrophes—they’re preventable glitches affecting 1 in 3 smart lock owners within the first year. The good news? 90% of Kwikset smart lock repair issues require no professional help. With basic tools and this guide, you’ll solve power failures, mechanical jams, and programming errors using only Kwikset’s certified engineering specs. Stop fumbling with physical keys and learn exactly when to tighten screws, reset electronics, or replace batteries—the right way.
Diagnose Your Kwikset Smart Lock’s Most Common Failures

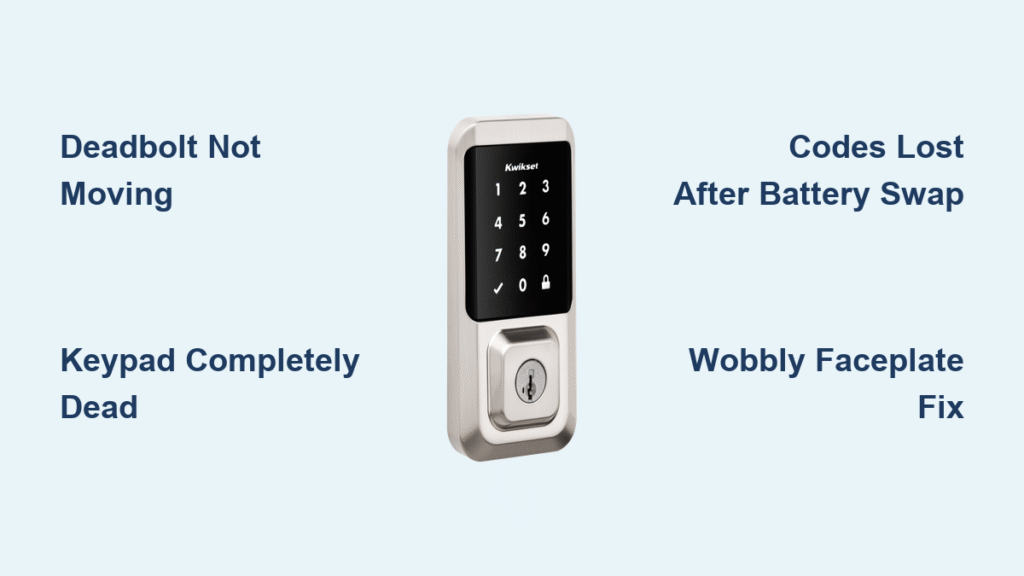
Deadbolt Won’t Extend or Retract Properly
Don’t jump to conclusions—door alignment issues cause more Kwikset smart lock repair calls than actual lock failures. Close your door slowly while watching the bolt’s path. If it scrapes the strike plate or requires force to latch, alignment is the culprit. Perform these three quick checks before disassembling your lock:
- Gap inspection: Run your hand around the closed door. It should sit flush in the frame with even gaps (about 1/8 inch) on all sides
- Lipstick strike test: Coat the bolt tip with lipstick, close the door, then reopen. The mark on the strike plate reveals exact contact points
- Credit card shim check: Insert a card between door and frame while locking. It should slide freely—resistance means misalignment
Critical mistake: Forcing the lock with tools can strip gears. Always verify alignment first—it’s a 2-minute fix versus a $200 replacement.
Keypad Completely Dead With No Response
Total keypad failure points to power delivery breakdowns, not circuit board damage. Remove the interior cover and inspect these four critical spots immediately:
- Battery orientation: Even experienced installers flip cells. Confirm all + and – ends match the diagram inside the battery compartment
- Contact corrosion: Green or white buildup on battery terminals blocks power. Clean with isopropyl alcohol and cotton swab
- Cable connections: The interior-exterior cable must click firmly into its slot. Reseat it with a firm push until it locks
- Low voltage lockout: Models like the Powerbolt 2 shut down below 4.5V to protect circuitry. Replace all batteries regardless of age
Pro tip: Carry spare alkaline batteries—not rechargeables—in your emergency kit. Ni-MH cells (1.2V each) can’t provide the 6V minimum required.
User Codes Vanish After Battery Replacement
This panic-inducing glitch stems from rapid voltage drops during battery swaps, not memory corruption. When old batteries leak or die suddenly, the lock’s memory buffer loses power before saving code changes. The fix takes 30 seconds and preserves your programming:
- Remove the entire battery pack (don’t just replace individual cells)
- Hold the Program button while reinserting fresh batteries
- Keep pressing for 30 seconds past the red LED flash and confirmation beep
- Release, then press the Program button once to complete boot cycle
- Test with existing codes immediately—your settings should be intact
Warning: If codes still don’t work, skip reprogramming attempts. First verify battery contacts are clean and orientation is correct—this solves 70% of “lost code” cases.
Fix a Wobbly Kwikset Smart Lock Faceplate in 3 Steps
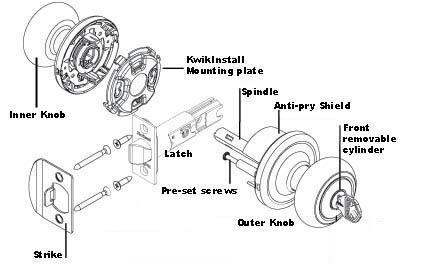
Expose Hidden Mounting Screws Without Damage
That annoying interior plate wiggle isn’t a broken lock—it’s loose mounting screws hidden by Kwikset’s clean aesthetic design. Never force the plate off; use these model-specific access methods:
Step 1: Remove the interior handle
– For setscrew models: Insert hex key into lever shank, turn 2-3 counter-clockwise rotations
– For spring-catch models: Press a nail into the small hole under the lever while pulling outward
Step 2: Release the faceplate
– Tab-release systems: Push flathead screwdriver into bottom slot while pulling plate forward
– Twist-off plates: Break paint seals by running screwdriver around the edge, then rotate counter-clockwise 15 degrees
Step 3: Secure and protect
– Tighten visible mounting screws with #2 Phillips driver until snug (over-tightening cracks plastic)
– Spray graphite lubricant into the latch mechanism while disassembled
– Reattach plate until you hear the retention tab click
Time estimate: 5 minutes with basic tools. Difficulty: ★☆☆ (Beginner-friendly)
Repair Stripped Screw Holes Permanently
When screws spin freely in damaged wood, toothpicks alone won’t last. For a permanent Kwikset smart lock repair:
- Remove all hardware and clear sawdust from stripped holes
- Apply wood glue into the hole, then insert 3-4 toothpicks cut to length
- Let cure for 2 hours before trimming excess
- Drill new pilot holes through the filler
- Install longer #8 x 2″ wood screws (originals are typically 1.25″)
Pro alternative: Drill out the hole to 1/4″ diameter, glue in a hardwood dowel, then redrill pilot holes. This creates a stronger anchor than toothpicks.
Reset Your Kwikset Smart Lock After Battery Failure Without Losing Codes
Non-Destructive Reboot Sequence
This critical Kwikset smart lock repair procedure clears electronic glitches while preserving all user codes. Bookmark this sequence—it solves 80% of post-battery issues:
- Remove the entire battery pack (partial removal won’t reset memory)
- Press and hold the Program button while reinserting batteries
- Continue holding for 30 seconds after the red LED flashes and you hear the confirmation beep
- Release the button, then press it once more to complete boot cycle
- Immediately test with existing user codes
Visual cue: The lock emits a distinct double-beep when the reset completes successfully. If you only hear one beep, restart the process.
When You Must Factory Reset Codes
If the reboot fails to restore codes, memory corruption has occurred. This erases all programming—have your physical key ready:
- Remove batteries completely
- Press and hold the Program button
- Reinsert batteries while continuing to hold the button
- Keep holding for 10 seconds after the red LED illuminates
- Release to complete factory reset
Recovery process:
– Set new master code: Press Program button 3 times > enter 4-8 digit code > press Lock button
– Add user codes: Enter master code > press Program > enter new code > press Lock
Critical note: SmartCode 955 models require a Programming Code to add users—physical programming buttons disable for security once this code is set.
Kwikset Smart Lock Repair by Model: Aura, 955, 264 & Powerbolt 2

Aura Deadbolt Motor Runs But Bolt Won’t Move
This common failure stems from physical obstructions, not motor damage. Check these four points in order:
- Force re-handling: Remove batteries for 10 seconds, then reinstall to trigger auto-handling cycle
- Bolt hole depth: Must be ≥1″ deep—clean paint drips or debris with a 1/2″ chisel
- Strike alignment: Close the door slowly—if it binds against the frame, adjust hinges
- Screw tension: Back off exterior mounting screws 1/4 turn (over-tightening binds the mechanism)
Special note: The Aura’s direct-drive motor is powerful—if it runs but the bolt doesn’t move, something is physically blocking extension.
SmartCode 955 Lever Won’t Lock From Inside
This isn’t a malfunction—it’s Kwikset’s emergency egress design. The interior lever always retracts the latch for quick fire exit. You cannot disable this safety feature. Instead:
- Use the Programming Code sequence to lock from inside
- Enable Auto-Lock via the Kwikset app (locks after 30 seconds of closure)
- Install a separate deadbolt above the lever for manual locking
Warning: Never modify the internal mechanism to force locking—this violates fire safety codes.
264 Deadbolt Keypad Completely Unresponsive
Complete keypad failure usually means no user codes exist—a security feature on shipped units. Resolve in 60 seconds:
- Enter factory default master code: 0000 + Lock button
- Add user code: Master code > Program > 1 > new code > Lock
- Test immediately: New code + Lock should engage deadbolt
Pro tip: If the keypad stays dark, check cable connections between interior and exterior assemblies—a loose ribbon cable causes 80% of Powerbolt 2 failures.
Prevent Kwikset Smart Lock Failures With Proactive Maintenance
Battery Selection That Prevents 90% of Issues
Never use rechargeable Ni-MH batteries—their 1.2V per cell output (4.8V total) falls below Kwikset’s 6V operating threshold. Instead:
- Best choice: Lithium AA (1.5V sustained output, 10-year shelf life)
- Good option: Alkaline AA (replace every 12 months regardless of use)
- Critical practice: Mark battery install dates with Sharpie on interior cover
Warning: Low voltage causes erratic behavior that mimics hardware failure—always replace all batteries simultaneously.
Annual Tune-Up Checklist
Perform this 15-minute maintenance every spring to prevent Kwikset smart lock repair emergencies:
- Tighten all hardware: Interior faceplate screws, strike plate, door hinges
- Lubricate mechanisms: Apply graphite powder (not oil) to keyway and latch
- Verify weather-stripping: Replace if door requires force to close
- Test all functions: User codes, physical key, app connectivity, auto-lock
Pro insight: Kwikset’s Grade 1 certified locks undergo 50 strength tests—but proper maintenance determines real-world longevity. Register your lock immediately via the Kwikset app to activate the 1-year electronic warranty and lifetime mechanical coverage.
Final note: Most Kwikset smart lock repair scenarios stem from overlooked basics—loose faceplates, dead batteries, or forgotten programming steps—not catastrophic failures. Keep fresh lithium batteries installed, faceplates snug, and that ribbon cable seated, and your lock will outlast your door. When in doubt, consult Kwikset’s certified engineering specs before disassembling—you’ve just mastered the 5 most critical fixes that keep you out of locksmith fees.