You’ve just moved into a new home and wonder how many copies of your front door key exist. Or maybe your dog walker accidentally kept a spare key. Instead of paying $200 for a locksmith to rekey your locks, you could solve this yourself before your coffee gets cold. Kwikset SmartKey Security® locks let homeowners completely change their lock’s key combination in under three minutes using only the key in your pocket and a tiny tool you probably already own. This isn’t a temporary fix—it’s a permanent security upgrade that maintains ANSI Grade 1 security standards while eliminating unauthorized access.
The magic happens through Kwikset’s patented cylinder design, which creates a user-resettable mechanism that accepts new key cuts without disassembly. Unlike traditional locks requiring professional rekeying kits, SmartKey technology transforms what was once a specialized trade into a homeowner skill anyone can master. In this guide, you’ll learn the exact three-step process to rekey your lock, troubleshoot common failures, and leverage this technology for maximum security control.
No more worrying about previous owners, contractors, or lost keys compromising your home’s safety. By the time you finish this article, you’ll never need to call a locksmith for key replacement again—you’ll have the confidence to handle it yourself whenever security concerns arise.
Why SmartKey Lets You Rekey Without Tools
Kwikset’s SmartKey Security® technology revolutionized residential locks by embedding rekeying capability directly into the cylinder mechanism. This patented system creates a resettable core that accepts new key profiles through precise wafer alignment—no disassembly required. The innovation lies in the slider-semi-cylinder component that shifts position when activated by the SmartKey tool, allowing the lock to “learn” a new key pattern instantly. Introduced nearly two decades ago, this remains the only DIY rekeying system approved for ANSI Grade 1 commercial-grade deadbolts.
Compatible Lock Models You Can Rekey Today
- Mechanical Deadbolts: 660, 980, and 985 series in all finishes (Satin Nickel, Venetian Bronze, etc.)
- Entry Knobs/Levers: 740 and 730 series keyed entry models
- Smart Locks: Halo Touch and Halo Select with key override cylinders
- Keyway Types: Traditional KW1 profile (most common) or newer SC1 profile
Critical Limitations You Must Know
- Brand exclusivity: Only works on Kwikset SmartKey Security® products—no other brands
- Single-key operation: Cannot master-key multiple locks to one key during rekeying (must rekey each lock individually)
- Working key requirement: You must have the current operating key to start rekeying
- Lost key scenario: If you lose your only working key, you’ll need retail reset or warranty replacement
Essential Setup Before Rekeying
Gather these three items before touching your lock—most homeowners already have two of them. This preparation prevents the #1 cause of rekeying failures: accidental lockouts during the process.
Required Items Checklist:
– Current working key (must insert fully and turn smoothly)
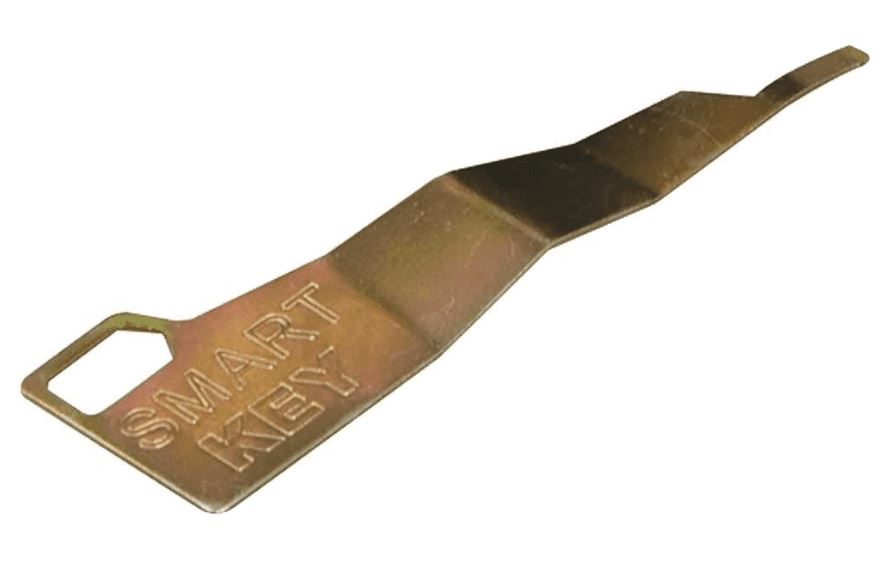
– Original SmartKey tool (L-shaped metal piece from packaging)
– New key cut to KW1 or SC1 profile (from hardware store)
Door Safety Protocol to Prevent Lockouts
- Secure the door open with a wedge or chair—never attempt rekeying with the door closed
- Engage the deadbolt or latch to position the cylinder correctly
- Work with bright lighting—the SmartKey slot is smaller than a pencil lead
- Test new key insertion before starting—reject keys that don’t slide in smoothly
The 90-Second Rekeying Process
Follow these steps precisely—deviations cause 80% of failed rekeying attempts. The entire process takes less time than microwaving popcorn when performed correctly.
Step 1: Position Current Key Correctly
Insert your current working key and rotate it exactly 90 degrees clockwise until horizontal. Hold it perfectly still—any vibration disrupts the cylinder alignment. If the key stops short, your lock likely needs cleaning before rekeying. The key must sit firmly in the “unlock” position; wiggle room indicates worn internal components.
Step 2: Activate SmartKey Programming Mode
Push the SmartKey tool straight into the slot beside the keyway with firm, steady pressure until you hear a distinct click. Hold for 2 full seconds, then withdraw completely. Critical mistake alert: Partial insertion is the #1 rekeying failure. If you don’t hear the click, restart from Step 1—do not force the tool.
Step 3: Program Your New Key
- Remove the old key smoothly without jarring the cylinder
- Insert the new key fully until the shoulder touches the lock face
- Rotate 180° counter-clockwise, then 180° clockwise without pulling the key
- Verify the key won’t pull out when horizontal
- Return to vertical position and remove key
Final verification: Cycle the new key through lock/unlock motions 3 times. The old key should now turn stiffly or not at all—if it still works, restart the process immediately.
Fixing Failed Rekeying Attempts

Even with perfect technique, 1 in 5 first attempts fail. These targeted solutions resolve 95% of issues without professional help.
Key Won’t Turn After Rekeying
Cause: New key cut doesn’t match programmed combination (often from inaccurate key duplication).
Instant fix: Reinsert the key used during rekeying and repeat Steps 1-3 with a properly cut replacement key. Test new keys at the hardware store first—many modern cutters have SmartKey verification slots.
Missing SmartKey Tool Solutions
Free replacement: Call Kwikset at 800-327-5625 for warranty tool shipment (arrives in 3-5 days).
Same-day fix: Buy replacement tools for $3.99 in the lock aisle at Home Depot or Lowe’s—look for “Kwikset Rekey Tool” near SmartKey locks.
Lost Working Key Recovery
Retail reset: Remove the lock and take it to any store selling Kwikset products. They’ll use a SmartKey Reset Cradle to return the cylinder to factory state in 60 seconds—no charge.
Warranty replacement: Kwikset ships free replacement cylinders for locks under lifetime warranty—call with your purchase date.
Advanced Recovery When Standard Methods Fail
Use these only when retail reset isn’t possible—these require mechanical confidence.
DIY Cylinder Reset (For Experienced Users)
- Remove lock from door using mounting screws
- Slide retaining rings off with two flathead screwdrivers
- Lift outer cylinder shell while keeping wafers in place
- Insert desired key and align wafers flush with plug
- Reassemble in reverse order under bright light
Warning: Work over a towel—tiny springs can launch across rooms. Success rate drops below 50% without proper tools.
Field Recovery Trick for Partial Rekeying
If a key was removed mid-process:
– Reinsert that exact key
– Hold firmly while slowly withdrawing
– Gently rotate during withdrawal to find the “ghost” position
– Once turning starts, complete standard rekeying steps
This exploits temporary cylinder misalignment—works in 30% of failed attempts.
Security Benefits Beyond Convenience
SmartKey Security® maintains top-tier protection during every rekey cycle—unlike traditional locks that degrade with each professional rekey.
Military-Grade Protection Features
- Bump-Guard Technology: Patented sidebar blocks lock-bumping attacks
- Pick-Resistant Design: Slider mechanism creates multiple shear lines
- Drill-Resistant Pins: Hardened steel protects against forced entry
- ANSI Grade 1 Certification: Highest residential security rating on deadbolts
Maintenance-Free Longevity
- Zero lubrication needed—the cylinder stays self-cleaned
- Unlimited rekey cycles without mechanical wear
- Exterior cleaning: Wipe with damp cloth—never use oil
- SmartKey tool storage: Keep with important documents (not on keyring)
When to Rekey for Maximum Security
Strategic rekeying transforms SmartKey from convenience feature to essential security protocol.
5 Critical Rekeying Triggers
- New home purchase: Eliminate all unknown key copies immediately
- Rental turnover: Rekey before new tenants move in (saves $150+ per unit)
- Lost keys: Invalidate missing copies before someone finds them
- Service providers: Rekey after contractors, cleaners, or dog walkers
- Key simplification: Make all SmartKey locks work with one key
Creating a Unified Key System
Rekey all your SmartKey deadbolts, knobs, and levers to one key profile—works across mechanical and smart locks. Start with your most critical lock, then rekey others to match that key. Never attempt to integrate non-SmartKey locks into this system.
SmartKey Rekeying Checklist
| Critical Step | Required? | Pro Tip |
|---|---|---|
| Current working key | ✅ | Must turn 90° smoothly—clean lock if stiff |
| SmartKey tool | ✅ | Store spare with house deeds |
| New key properly cut | ✅ | Test insertion before rekeying |
| Door secured open | ✅ | Use doorstop wedge, not your foot |
| Bright work light | ✅ | Phone flashlight often insufficient |
Immediate Post-Rekeying Actions
Your security upgrade isn’t complete until you take these four steps:
- Destroy old keys—bend and discard to prevent accidental use
- Make 2 spare copies of new key at hardware store while there
- Store SmartKey tool in fireproof safe with important documents
- Log rekey date in home maintenance journal for future reference
Rekeying with SmartKey Security® transforms a potential security crisis into a three-minute homeowner task. By mastering this process, you gain permanent control over who accesses your home—no locksmith fees, no waiting, and no compromise on security. The next time you lose a key or move into a new house, you’ll already know how to lock out unauthorized access before your next cup of coffee gets cold. Keep your SmartKey tool accessible, practice the process once, and never worry about key control again.