You’re standing at your front door with a brand-new key, but your Kwikset SmartKey lock won’t budge. The original key is lost, broken, or worse—your last rekey attempt jammed the mechanism completely. Panic sets in when you realize standard rekeying instructions require a working key to start the process. This exact nightmare happens to thousands of homeowners annually when keys vanish or rekeying fails mid-process. The critical truth? You absolutely can rekey a smart lock without the original key by resetting the cylinder to factory state. In this guide, you’ll discover three field-tested methods—including a 5-minute store fix and warranty loophole—to restore full functionality using nothing but basic tools or a quick phone call. Most solutions take under an hour and cost nothing if you act smart.
Kwikset SmartKey technology revolutionized DIY rekeying with its 30-second process, but it has one critical limitation: the lock must rotate freely with an existing key to initiate reprogramming. When keys disappear or rekeying fails (like when a key gets pulled out prematurely), the sidebar mechanism jams, rejecting all keys permanently. Unlike traditional pin-tumbler locks, SmartKey cylinders won’t respond to lock picking or bump keys in this state. The solution requires returning the core to its “unprogrammed” factory condition—a step most manuals omit because it assumes you always have a working key. Don’t waste money on emergency locksmiths; with the right approach, you’ll have your lock accepting a completely new key (even a generic KW1 blank) within an hour. Let’s get you back inside.
Reset Cradle Method: 5-Minute Store Fix (Zero Disassembly)

When you need working keys yesterday, this is the undisputed fastest solution. Hardware stores keep specialized reset cradles—the same jigs locksmiths use—to instantly return jammed SmartKey cylinders to factory state. Crucially, you only need the bare cylinder, not the entire lock assembly. The process exploits how SmartKey’s sidebar mechanism works: the cradle applies precise pressure to retract the sidebar and eject wafers, resetting the core in seconds. Best of all, most major retailers perform this service free of charge with no appointment needed.
Removing Your Cylinder From Any Lock Type
Deadbolts: Start by removing the two interior mounting screws. Pull the interior and exterior halves apart until you see the cylinder. Locate the small set screw on the edge of the door and loosen it completely. Now slide the cylinder straight out—you’ll hear a faint “click” as it disengages from the tailpiece.
Knobs or Levers: First remove the knob/lever using the set screw on the shank. Reach inside the mounting plate and pull the thin spindle while compressing the spring. Rotate the plug to approximately 5 o’clock position (like a clock face), then pull the cylinder straight out. If it resists, gently wiggle while maintaining spindle tension.
Getting Your Free Reset at Home Depot or Lowe’s
Bring only the bare cylinder (no mounting hardware) to the lock service counter at Home Depot, Lowe’s, or Ace Hardware. Avoid saying “I need to rekey”; instead ask: “Can you reset this Kwikset SmartKey cylinder using your reset cradle?” Associates insert it into the bench jig, close the lever for 5 seconds, and hand back a factory-reset core. Most stores provide this free—only independent locksmiths might charge $5-$15. While waiting, purchase two new KW1 or KW10 keys ($3 each) to avoid returning home empty-handed.
Reprogramming With Your New Key at Home
Reinstall the reset cylinder into your lock housing. Insert your new key fully and turn it clockwise to the 12 o’clock position. Insert the SmartKey rekey tool (the small metal tab included with new locks) into the slot beside the keyway. Hold both in place while turning the key counterclockwise to 9 o’clock. Remove the tool and key—you’ve just rekeyed successfully. Critical test: Operate the new key three times before closing the door. If it sticks on the third try, repeat the rekeying sequence immediately.
DIY Disassembly Reset: 30-Minute Fix (Warranty Void but Reliable)
When stores are closed or you’re miles from a hardware shop, disassembling the core yourself becomes essential. This method bypasses the reset cradle by manually manipulating the wafer sliders and sidebar. Warning: it voids Kwikset’s warranty and involves 30+ microscopic parts. Never attempt this with the cylinder mounted in the door—always remove it first. Work over a towel or magnetic tray to prevent losing critical components. Success rate exceeds 90% when following these precise steps.
Essential Tools You Can’t Skip
- Small flat-head screwdriver (precision jeweler’s type works best)
- Needle-nose pliers or tweezers (for wafer handling)
- The new key you want to program
- Non-negotiable: A white towel or cookie sheet to catch falling parts
- Optional but recommended: Headlamp for visibility, phone to photograph each disassembly stage
Step-by-Step Core Extraction Without Losing Parts
Step 1: Remove the C-Clip Safely
Press the brass cap pin at the cylinder’s rear with a paperclip until it depresses. Slide the steel C-clip off horizontally—never pry vertically. Store it in a bottle cap immediately. If the pin doesn’t depress, tap the cylinder lightly on a table to free it.
Step 2: Extract the Plug Assembly
Insert your new key (it won’t turn yet). Hold the cylinder vertically with keyway facing up. Tap the rear end firmly against your palm 3-4 times. The plug assembly will slide forward 1/4 inch, exposing the wafers and sidebar. Visual cue: You’ll see five small metal sliders aligned with springs.
Step 3: Reset Wafers and Avoid Critical Errors
With the new key fully inserted, push each wafer downward until its gate aligns flush with the sidebar groove. Check wafer orientation: the “V” cut must face the key. If any wafer is bent, straighten it with tweezers. Critical mistake to avoid: Two tiny ball bearings sit beneath the sidebar—don’t lose them during reassembly. If they fall out, place them back before sliding the outer shell on.
Step 4: Reassemble Without Jamming
Slide the outer shell over the core while maintaining downward pressure on the wafers. Snap the two brass slip rings into place with screwdriver pressure. Reinstall the C-clip by aligning it with the groove and sliding it on horizontally. Test key rotation through 360° before reinstalling in the door.
Warranty Replacement: Free Cylinder from Kwikset (Under 1 Year Old)
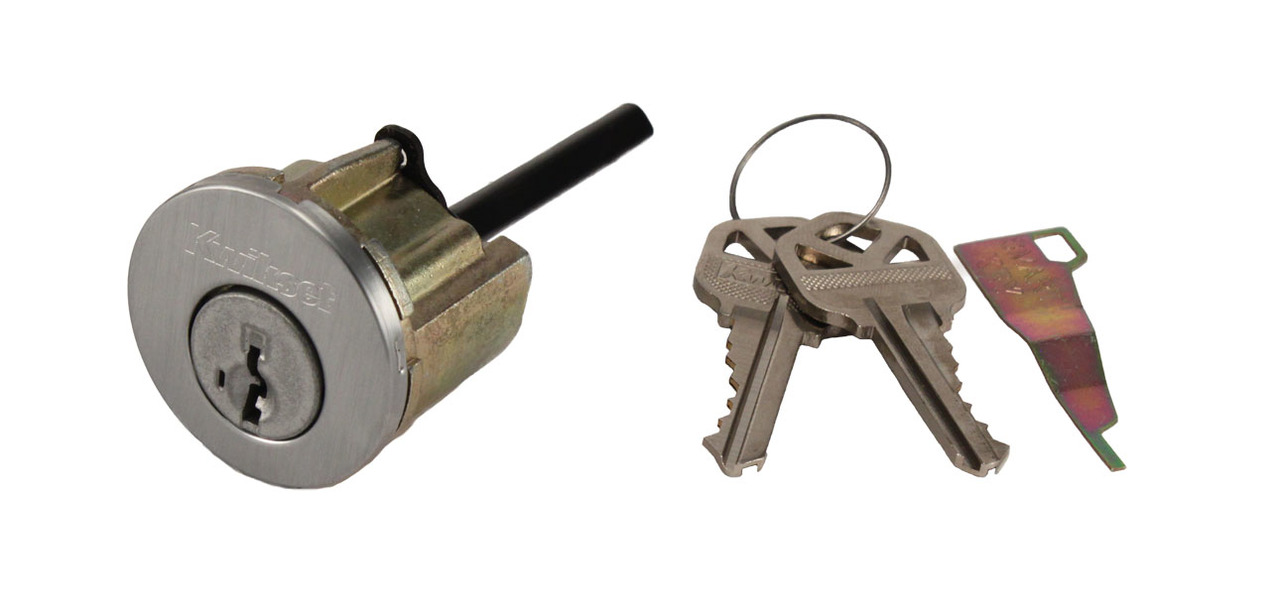
If your lock is recent, Kwikset’s warranty covers failed rekeying attempts even without a receipt. Their support team routinely ships replacement cylinders with two new keys at no cost when you describe the failure correctly. This method requires no tools or disassembly but only works for locks under 12 months old. Success depends entirely on how you phrase the problem during the call—never say “I lost my key.”
Qualifying for the Free Replacement
Call 800-327-5625 and state exactly: “My SmartKey cylinder won’t turn after a failed rekey attempt—I have no working keys.” Provide the model number (etched on the latch face or keyway rim). Key qualification tip: Emphasize “no-key function failure” rather than key loss. Kwikset considers this a manufacturing defect if the lock jammed during rekeying. Receipts help but aren’t required if you’re the original purchaser. Expect a replacement cylinder with two keys within 3 business days via prepaid shipping.
Emergency Key Retraction Trick (30% Success Rate)
Before disassembling or traveling to a store, try this last-resort method if your last rekey attempt failed midway. It works when the sidebar is partially engaged but not fully jammed. Success rate is only 30%, but it takes 2 minutes and costs nothing.
When to Attempt This Method
Insert the same key used in the failed rekey. Turn clockwise while slowly pulling the key outward in millimeter increments. The moment you feel a distinct “click” (the sidebar releasing), stop pulling and immediately insert the SmartKey rekey tool. Complete the rekeying sequence by turning counterclockwise. Critical cue: If you hear grinding or feel resistance, stop—you’re forcing it and may cause permanent damage. Only attempt this 3 times before switching methods.
Which Method Should You Choose? Decision Matrix
| Your Situation | Best Solution | Time Required | Cost |
|---|---|---|---|
| Key jammed during rekeying | Key Retraction Trick | 2 minutes | $0 |
| Original key lost/broken | Store Reset Cradle | 45 minutes (round trip) | $0-$15 |
| Lock under 1 year old | Warranty Replacement | 3 days shipping | $0 |
| No store nearby, warranty expired | DIY Disassembly | 30 minutes | $0 |
Preventing Future Lockouts: SmartKey Best Practices
Store your rekey tool intelligently: Tape it inside the smart lock’s battery compartment or strike plate box—never lose it with your keys. Always test new keys three times before reinstalling the lock to catch alignment issues early. Keep a spare unprogrammed cylinder ($12 online) for instant swaps during emergencies. Most importantly, maintain a fallback key until rekeying completes successfully—never discard your working key until the new one operates flawlessly three times in a row.
Final Checklist Before Starting
- [ ] Confirm it’s a SmartKey lock (small slot beside keyway)
- [ ] Remove cylinder from door before disassembly
- [ ] Work over towel to catch microscopic parts
- [ ] Verify new key is KW1 or KW10 profile
- [ ] Test key operation 3x before final installation
With these proven methods, you can rekey a smart lock without the original key regardless of your situation. The reset cradle method delivers speed, warranty replacement offers hassle-free fixes for new locks, and DIY disassembly provides total control when stores aren’t an option. Remember: never force keys or tools, always work over a containment surface, and test rigorously before closing the door. Within an hour, you’ll have full access restored with a completely new key—no locksmith fees, no waiting, and no permanent damage to your security system. Keep this guide bookmarked, and you’ll never face a locked-out emergency again.