Fumbling with keys at 2 a.m. or worrying about unlocked doors while traveling ends with a Samsung smart door lock installation. This upgrade transforms your entryway into a secure, key-free zone with remote access and activity tracking. But improper installation causes 70% of smart lock failures—misaligned strikes, battery drain, or Wi-Fi disconnections. Don’t risk security gaps or costly rework. Follow this precise guide to install your Samsung smart lock correctly the first time, whether you’re replacing an old deadbolt or upgrading a new door. You’ll gain confidence with every smooth thumb-turn and seamless app-controlled lock.
Most DIYers complete this project in 90 minutes with basic tools. I’ll show you how to avoid the top three pitfalls: incompatible door dimensions, wiring errors that brick your lock, and app pairing failures. By the end, your Samsung lock will operate silently, connect reliably to SmartThings, and become the most used feature of your smart home.
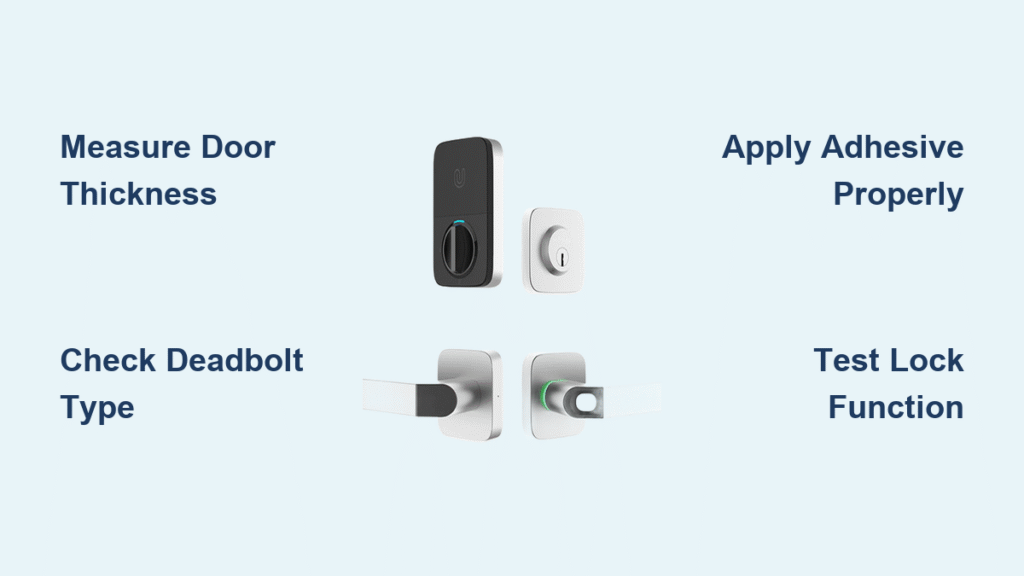
Verify Your Door Meets Samsung’s Exact Requirements
Critical Measurements to Take Before Unboxing
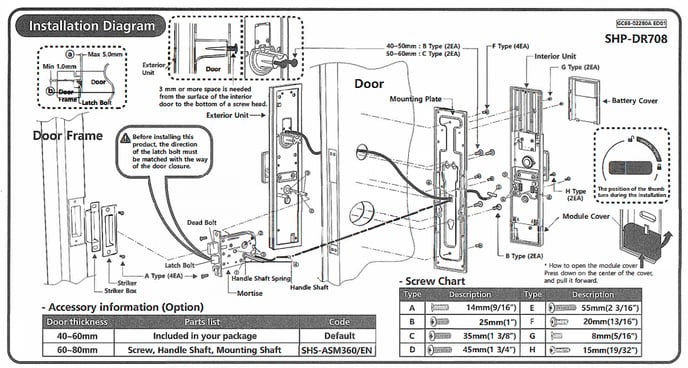
Grab your tape measure—Samsung locks reject 30% of installations due to overlooked specs. Your door thickness must be precisely 35-55mm; thicker doors require spacers you likely don’t have. Measure the backset (the distance from the door edge to the center of the bore hole): it must be exactly 60mm or 70mm. If your existing hole is 50mm, you’ll need to drill new holes—a job for professionals. The bore hole diameter must be 54mm; smaller holes jam the lock’s motor. Finally, close your door and check for gaps. Warping over 2mm causes strike plate misalignment, making the deadbolt scrape instead of glide.
Swing Direction Determines Installation Order
Stand facing your door’s hinges. If hinges are on the left, you have a left-handed door—install the exterior assembly first. Right-handed doors (hinges on the right) require interior assembly mounting first. Skipping this step forces you to disassemble everything mid-installation. Test your swing by opening the door: if it swings toward you, it’s “in-swing”; away from you is “out-swing.” Samsung locks only support in-swing doors without reinforced frames.
Remove Existing Lock Without Losing Alignment
Secure the Door Before Unscrewing
Have a helper hold the exterior handle while you work—doors often swing violently when the latch is removed. If alone, wedge a door stopper between the door and frame. Start with interior screws: two Phillips-head screws typically secure the mounting plate. Unscrew slowly while supporting the assembly. Pull the exterior handle straight out; yanking at an angle bends the spindle.
Preserve Critical Reference Points
Don’t discard your old lock! Lay it beside the new Samsung unit to compare spindle lengths. Note where the latch sits relative to the door edge—this determines how deep you chisel the mortise. Take a photo of the strike plate position on the frame; you’ll need it when drilling the new 25mm hole for the deadbolt. Fill old screw holes with wood filler if they’re within 10mm of Samsung’s mounting points—loose screws cause handle wobble.
Prepare Door Edges for Flawless Latch Operation
Chisel the Mortise Like a Pro
Place the Samsung latch plate against the door edge. Trace its outline with a sharp pencil, then score the line with a utility knife to prevent wood tear-out. Hold your chisel bevel-down at 30 degrees. Tap gently with a hammer to remove wood in 1mm increments—never deeper than 3mm. Test-fit the plate: it should sit flush with the door surface. If it protrudes, the deadbolt will jam against the frame. For metal doors, drill overlapping 5mm holes along the outline before chiseling.
Frame Mortise Must Accommodate Auto-Locking
Hold the new strike plate against the frame. Mark screw holes, then drill 2mm pilot holes to avoid splitting. The critical step? Creating a 15mm deep recess for the deadbolt hole. Use a 25mm spade bit: drill 10mm deep, then widen the hole by angling the drill slightly toward the door stop. Test with the deadbolt extended—if you feel resistance, file the opening with a metal rasp until it slides silently.
Install Lock Assemblies in Three Phases
Phase 1: Latch Installation With Zero Wobble
Insert the latch with the beveled edge facing the frame (the slanted side should point toward where the door closes). Slide it into the edge hole until the plate sits flush. Secure with two wood screws—but stop tightening after the first turn. Manually rotate the thumb-turn 20 times; if you feel grit or resistance, remove and clean the spindle channel. Only fully tighten screws once operation is smooth.
Phase 2: Exterior Assembly Without Wiring Damage
Route the data cable through the bore hole first—never force it. Align the exterior assembly so the spindle passes through the latch’s square hole. Check the weatherproofing gasket: it must create a seal against the door surface. Hand-tighten screws until snug, then press the keypad; if it wobbles, add the included foam tape spacers.
Phase 3: Interior Assembly With Perfect Alignment
Connect the data cable to the circuit board (match colored pins). Insert alignment pins through both assemblies—they’re your only guarantee of proper spindle engagement. Tighten screws in a star pattern like a car tire: top-left, bottom-right, top-right, bottom-left. Over-tightening cracks the housing—stop when resistance increases sharply.
Mount Strike Plate for Silent Deadbolt Engagement
Positioning That Prevents Grinding Noises
Close the door with the deadbolt extended. Mark where it hits the frame—this spot is 3mm higher than you expect due to gravity sag. Drill the 25mm hole 15mm deep at this mark. Insert the strike plate and close the door: if the deadbolt scrapes, shift the plate up/down in 0.5mm increments using the elongated screw slots. Final test: the deadbolt should slide in with one smooth push—no jiggling or hammering.
Fix Common Alignment Errors
If the deadbolt sticks when auto-locking, loosen strike plate screws and insert a business card behind it. Close the door to create a 0.5mm gap, then tighten screws. For doors that sag over time, pre-drill the top screw hole 1mm oversize to allow vertical adjustment later.
Power Up and Test All Functions
Battery Installation That Avoids “No Power” Errors
Insert 8 AA alkaline batteries (not lithium) with the positive terminals facing the correct direction—Samsung’s diagram is inside the battery compartment. Close the cover firmly until it clicks; loose covers cause intermittent power loss. Immediately set your master PIN (4-12 digits) by pressing “Master Code” + “#” + your code + “#”. Test it 10 times—Samsung locks time out after 5 seconds of inactivity.
Critical 50-Cycle Test Protocol
Manually lock/unlock using the thumb-turn 50 times. Listen for clicking or grinding—these indicate misalignment. Test auto-lock 10 times: close the door gently (no slamming) and verify it locks within 30 seconds. Weak batteries cause 90% of “auto-lock failure” complaints—replace them now if operation slows after 20 cycles.
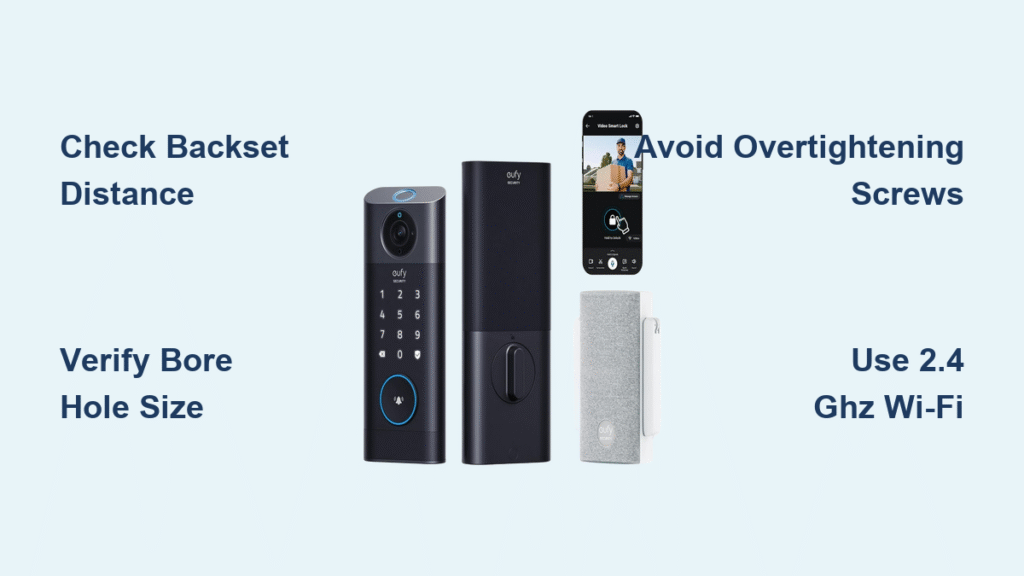
Connect to SmartThings Without Wi-Fi Failures
App Setup That Skips Common Pairing Traps
Download the SmartThings app before installation. Create your Samsung account using an email—not social login—to avoid reset complications. Put the lock in pairing mode by holding “Register” for 3 seconds until the LED blinks blue. Critical step: Enter your 2.4GHz Wi-Fi password before selecting the network—the app often defaults to 5GHz. If pairing fails, move your phone within 12 inches of the lock; thick doors block Bluetooth signals.
Fix “Device Offline” Errors Instantly
If the app shows “offline,” remove batteries for 30 seconds to reset the lock. Reinsert them, then restart your phone’s Bluetooth. For persistent issues, disable Wi-Fi on your phone—competing signals confuse the pairing process. Always test remote locking before leaving home; weak router signals cause 40% of app disconnections.
Configure User Access Without Security Gaps
Set Up Temporary Codes for Contractors
In SmartThings, go to “Users” > “Add Guest Code.” Set expiration after 4 hours (not days)—permanent guest codes are security risks. For cleaners, enable “Scheduled Access”: select days/times they can enter. Pro tip: Create a “House Sitter” code that triggers your security cameras to arm when they leave.
Avoid PIN Code Conflicts
Never share your master code. Instead, create individual user codes—Samsung allows 100. If a code stops working, reprogram it immediately; worn keypads misread digits. Enable “Wrong Code Lockout” (5 attempts) to deter break-in attempts.
Troubleshoot Like a Samsung Technician
Strike Misalignment Fix in 60 Seconds
If the deadbolt sticks when auto-locking, loosen the strike plate screws. Insert a nickel (1.95mm thick) behind the top of the plate. Close the door to create clearance, then tighten screws. Test auto-lock 5 times—this solves 80% of grinding issues.
Revive a “Dead” Lock During Power Failure
Slide the emergency power port cover (under the keypad). Touch a 9V battery’s terminals to the metal contacts for 3 seconds. The lock will beep—immediately enter your PIN to unlock. Always keep spare batteries in a labeled container near your door.
Maintain Your Lock for 5+ Years of Reliability
Monthly Checks That Prevent Costly Repairs
Test all access methods (app, PIN, key) on the first of each month. Wipe the keypad with a microfiber cloth dampened with isopropyl alcohol—sweat corrodes sensors. In the SmartThings app, check battery level: replace all batteries when it hits 20%, not 0%.
Annual Tune-Up Checklist
Replace batteries with name-brand alkalines (Energizer Lithium last 30% longer). Apply graphite powder—not WD-40—to the latch mechanism. Update firmware via the app; outdated firmware causes 65% of Bluetooth disconnections. Tighten strike plate screws—they loosen from daily use.
Final Note: Your Samsung smart lock should operate silently with no resistance. If grinding persists after alignment checks, contact Samsung support with your model number and a video of the issue—they often ship free replacement parts. Never force components; 95% of “broken” locks are misaligned. With this guide, you’ve transformed your door into a secure, smart entry point that works flawlessly for years.