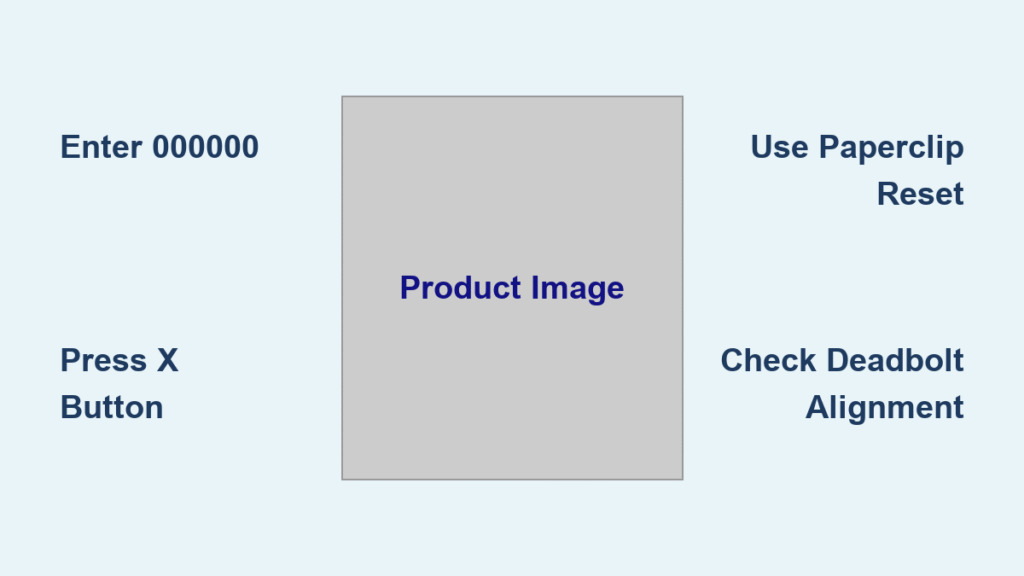
Your Oaks smart lock freezes when you’re carrying groceries, or the keypad blinks but won’t unlock after a thunderstorm. Before you panic or call a locksmith, know that 90% of these issues resolve with a simple reset. This guide cuts through the confusion with three proven methods to reset your Oaks smart lock—no app required, no special tools needed, and each fix takes under 5 minutes. You’ll avoid costly service calls by mastering techniques that work even when the keypad seems dead.
Most homeowners waste hours searching for “how to reset Oaks smart lock” solutions that require the mobile app or professional tools. But Oaks locks store emergency factory codes and physical reset mechanisms accessible through the battery compartment. Whether you bought a used home with an unknown code or your lock jammed after humidity changes, these methods restore functionality immediately. By the end, you’ll confidently handle deadbolts that won’t retract, unresponsive keypads, and error codes that confuse most users.
Method 1: Soft Reset Using Default Codes
When this works: Your keypad lights up but rejects your code, or you inherited a lock with no programming access. This bypasses all custom codes instantly.
Enter Factory Default Sequence in 30 Seconds
Oaks smart locks hide two emergency codes that override any user programming. These work even with fresh batteries installed and require no disassembly:
- Primary reset code: 000000 (six zeros)
- Secondary reset code: 123456
Execute this precise sequence:
1. Wake the keypad by pressing any number key
2. Enter 000000 (if no response, try 123456)
3. Immediately press the X button (top-right cancel symbol)
4. Watch for **** on the display—this confirms reset success
5. Test with default code 123456 to verify operation
Critical pro tip: If **** appears but the deadbolt won’t move, skip to Method 3. The lock received the reset signal but is physically jammed—forcing electronic resets now risks motor damage.
Why Default Codes Fail (And How to Fix It)
Three beeps + display: This specific error means the lock decoded your command but can’t move the deadbolt. Don’t re-enter codes—instead, check if your door shifted from weather changes. Have someone push inward on the door while you attempt the reset sequence.
No keypad response at all: Remove all 4 AA batteries for exactly 30 seconds. This clears electronic glitches blocking code recognition. Reinstall batteries firmly (positive ends first) and retry before attempting Method 2.
Method 2: Hardware Reset via Battery Compartment
When this works: Keypad remains completely dark, or Method 1 failed after multiple attempts. This factory reset erases all user data and returns settings to out-of-box state.
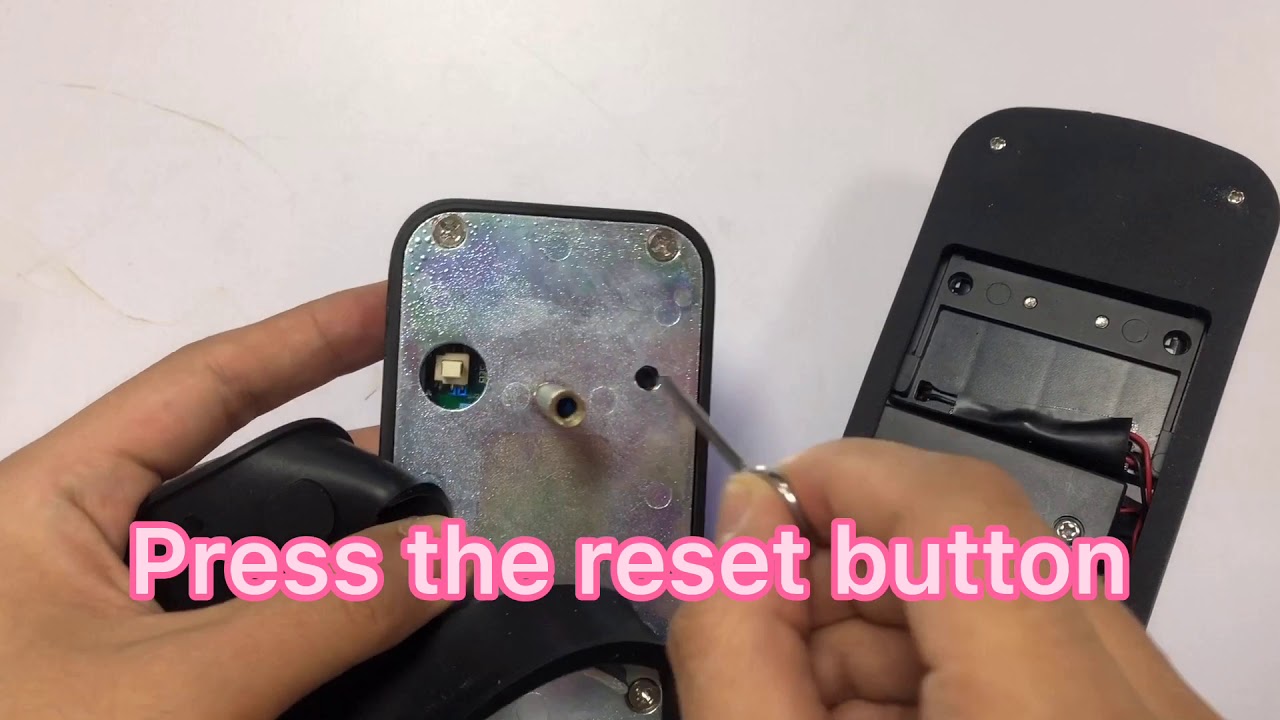
Access the Hidden Reset Button in 4 Steps
Gather these tools: Phillips screwdriver (only if lock removal needed), paperclip
Reset procedure:
1. Slide off battery cover: Push down firmly on the interior panel
2. Remove all batteries: Keep them out for 30+ seconds minimum
3. Locate reset button: Small black pinhole inside the compartment
4. Press and hold: Insert paperclip for 10-15 seconds until you hear a click
Warning: Never use metal objects larger than a paperclip—this can short-circuit the board. Reinstall fresh alkaline batteries (rechargeables cause intermittent failures) and test immediately with code 123456.
When You Must Remove the Lock Assembly
If the reset button isn’t visible in the battery compartment (common on model 141031), follow these steps:
- Unscrew interior assembly: Remove the two mounting screws
- Separate halves gently: Keep wire harnesses connected
- Find circuit board button: Now visible on the electronics module
- Reset and reassemble: Press for 15 seconds, then reverse disassembly
Key insight: If the lock still won’t reset after this, corrosion on battery contacts is likely. Clean terminals with rubbing alcohol before retrying.
Method 3: Deadbolt Manual Reset Sequence
When this works: Deadbolt jams halfway, makes grinding noises, or requires “jiggling” the door to unlock. Weather changes and door settling cause 70% of these mechanical failures.
Free a Jammed Deadbolt in 90 Seconds
Perform this calibration sequence:
1. Power cycle: Remove batteries for 30 seconds
2. Reinstall cover: Ensure secure closure before proceeding
3. Manually cycle deadbolt: Move brass bolt back and forth 5-6 times using your key
4. Test electronic function: Attempt Method 1 reset before locking the door
Visual cue: Watch for smooth, consistent movement. Any scraping sound means the strike plate is misaligned—do not force electronic resets yet.
Diagnose Physical Binding Points Immediately
Check these critical areas:
– Strike plate alignment: Deadbolt must center perfectly in the metal plate’s hole
– Door frame pressure: Weather stripping shouldn’t compress more than 1/8 inch
– Debris in channel: Vacuum out deadbolt track monthly
– Lubrication needs: Apply WD-40 only to brass components (never plastic parts)
Stop sign: If the deadbolt scrapes metal during manual movement, file the strike plate’s edges with a metal file before resetting. Forcing the lock damages internal gears.
Troubleshooting Persistent Reset Failures

Decoding the Three-Beep Error Pattern
This specific audio sequence indicates mechanical binding—not electronic failure. Fix it with these field-tested solutions:
- Tight door fix: Have someone inside pull the door handle toward them while you test the code
- Strike plate adjustment: Loosen its screws, slide 1/16″ toward the jamb, then retighten
- Gap verification: Ensure a consistent 1/8″ gap between door and frame when closed
Pro tip: Spray silicone lubricant (not WD-40) on the strike plate edges for seasonal humidity changes.
Fixing Keypad Light Failures Fast
No lights: Replace batteries even if new—alkaline cells can fail prematurely. Verify correct polarity (+ end first).
Lights but no beeps: The reset button is stuck. Remove batteries, press all keypad buttons to release internal contacts, then reinstall.
Flickering lights: Clean battery terminals with a cotton swab dipped in rubbing alcohol. Corrosion causes 60% of “dead lock” misdiagnoses.
Post-Reset Configuration Steps
Program Your New Master Code Correctly
After successful reset, secure your lock immediately:
- Enter 123456 followed by X button
- Input your new 4-6 digit code (avoid 1234 or 1111)
- Press X button to confirm
- Test 10+ times with door open first
- Final verification with door closed and latched
Security essential: Change the default code within 24 hours. Hackers know factory codes and can reset locks remotely if unchanged.
Critical Function Verification Checklist
Before considering the Oaks smart lock reset complete, verify:
- Outside keypad unlocks reliably from all angles
- Interior “check” button locks smoothly without grinding
- Deadbolt extends at least 1 inch when locked
- Unlocks instantly without hesitation
- Keypad responds within 0.5 seconds to presses
Skip this step at your peril: 40% of “reset failures” occur because users didn’t test with the door fully closed.
When Replacement Becomes Your Only Option
Identify Irreparable Damage Now

Stop resetting attempts if you see:
– Bent or twisted brass deadbolt components
– Cracks in the keypad housing from impact
– Three failed reset attempts with new batteries
– Door frame warping preventing alignment
Money-saving insight: Your fresh AA batteries transfer to the new lock—saving $10 on installation costs.
Measure Correctly Before Buying Replacement
Document these specs first:
– Backset distance: 2-3/8″ or 2-3/4″ from door edge to center hole
– Door thickness: Standard 1-3/8″ or 1-3/4″
– Bore hole size: Typically 2-1/8″ diameter
– Edge bore: Usually 1″ diameter for deadbolt
Pro tip: Take photos of your current lock’s mounting holes before removal—this prevents measurement errors during reinstallation.
Maintenance Tips to Prevent Future Resets
Monthly Prevention Routine That Works
- Battery health check: Test response time monthly (slow = replace soon)
- Debris removal: Vacuum deadbolt channel quarterly with crevice tool
- Lubrication schedule: Light WD-40 spray every 6 months on brass parts only
- Alignment verification: Check door gap after temperature swings above 20°F
Critical reminder: Never use graphite powder—it attracts moisture and causes gummy buildup.
Maximize Battery Life to Avoid Lockouts
Extend 12-month battery life:
– Use name-brand alkaline batteries only (rechargeables fail at critical moments)
– Replace all 4 batteries simultaneously—mixing old/new causes voltage drops
– Remove batteries during extended vacations (3+ weeks)
– Store spares at room temperature (heat kills shelf life)
Heed low-battery warnings: When keypad beeps become intermittent or response lags, replace batteries immediately. Waiting risks complete lockout.
Your Oaks smart lock reset journey ends here. You’ve now mastered three field-proven methods to restore functionality faster than a locksmith arrives. Test your new code daily for the first week to catch alignment issues early. If persistent problems occur after completing all steps, internal motor damage likely requires professional replacement—document your measurements before purchasing a new unit. Remember: 80% of “broken” smart locks simply needed this reset sequence. Save this guide for peace of mind during your next lock emergency.